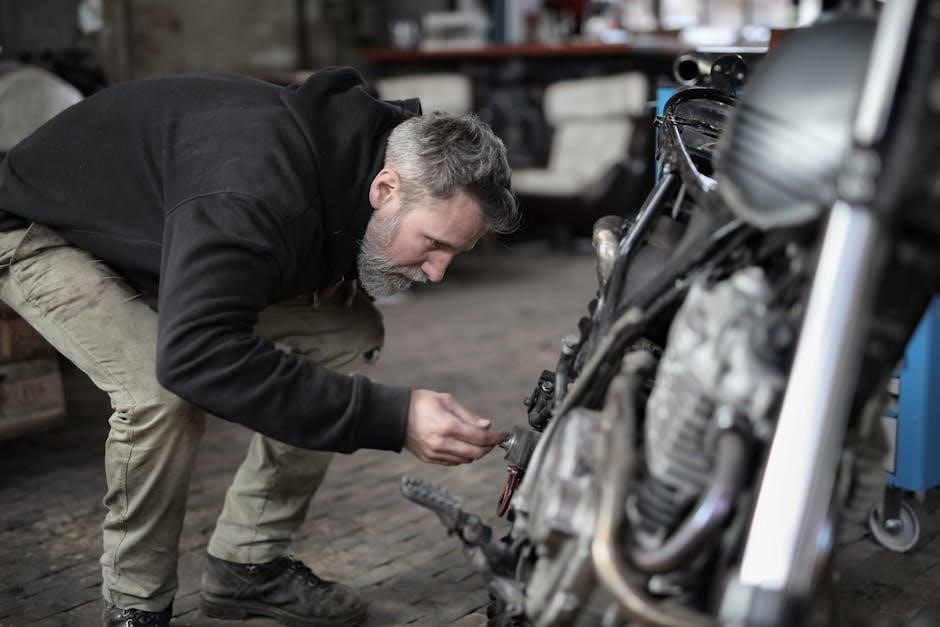
Small engine repair is essential for maintaining equipment like lawn mowers‚ generators‚ and chainsaws. Regular maintenance ensures optimal performance‚ reduces breakdowns‚ and extends engine life. DIY repair can be cost-effective and rewarding‚ but requires basic tools and knowledge. Understanding proper techniques and safety guidelines is crucial for successful small engine repair; This manual provides a comprehensive guide to help you get started.
1.1 Importance of Regular Maintenance
Regular maintenance is crucial for small engines to ensure reliability‚ efficiency‚ and longevity. Neglecting routine checks can lead to unexpected breakdowns‚ costly repairs‚ and reduced performance. Proper upkeep‚ such as oil changes‚ filter cleaning‚ and spark plug inspections‚ prevents wear and tear. It also enhances fuel efficiency and ensures the engine runs smoothly under various conditions. Consistent maintenance habits help identify potential issues early‚ saving time and money. A well-maintained engine guarantees optimal performance and extends its lifespan.
1.2 Basic Tools and Equipment Needed
Essential tools for small engine repair include pliers‚ screwdrivers‚ wrenches‚ and sockets. A multimeter helps diagnose electrical issues‚ while a torque wrench ensures proper bolt tightening. A compression tester checks engine health‚ and a spark tester verifies ignition function. Basic supplies like a funnel‚ drain pan‚ and rags are necessary for oil changes. Protective gear‚ such as gloves and safety glasses‚ is vital for safety. A work light illuminates dark spaces‚ and specialized tools like a piston ring compressor may be needed for advanced repairs.
1.3 Safety Precautions and Guidelines
Always wear protective gear‚ including gloves and safety glasses‚ when working on small engines. Ensure the engine is cool before starting repairs. Disconnect the spark plug wire to prevent accidental ignition. Work in a well-ventilated area to avoid inhaling fumes. Use jack stands for stability if lifting the equipment. Never smoke or use open flames nearby. Follow manufacturer guidelines for handling chemicals and dispose of waste properly. Keep loose clothing and long hair tied back to avoid accidents. Maintain a clean workspace to reduce tripping hazards and improve visibility.
Understanding Small Engine Components
Understanding small engine components is crucial for effective repair. Key parts include the piston‚ crankshaft‚ and cylinder‚ which work together to generate power. The carburetor‚ fuel system‚ and ignition components ensure proper combustion and performance. Familiarizing yourself with these elements is essential for diagnosing and fixing issues efficiently.
2.1 Overview of Engine Parts and Functions
A small engine comprises essential parts that work together to convert fuel into mechanical energy. The cylinder block houses the piston‚ which moves up and down due to explosive forces created by fuel combustion. The crankshaft converts this linear motion into rotational energy. The camshaft operates the valves‚ controlling airflow and fuel intake. The flywheel smoothens engine operation‚ while the muffler reduces noise. Each component plays a vital role in ensuring efficient engine performance and longevity.
2.2 The Role of the Carburetor and Fuel System
The carburetor mixes air and fuel to create the proper combustion mixture for the engine. It regulates airflow and fuel flow‚ ensuring the correct ratio for efficient operation. The fuel system‚ including the fuel tank and lines‚ delivers fuel to the carburetor. A malfunctioning carburetor or clogged fuel line can lead to poor engine performance‚ such as difficulty starting or rough running. Proper maintenance‚ like cleaning or replacing the air filter‚ is essential to maintain optimal fuel flow and engine efficiency.
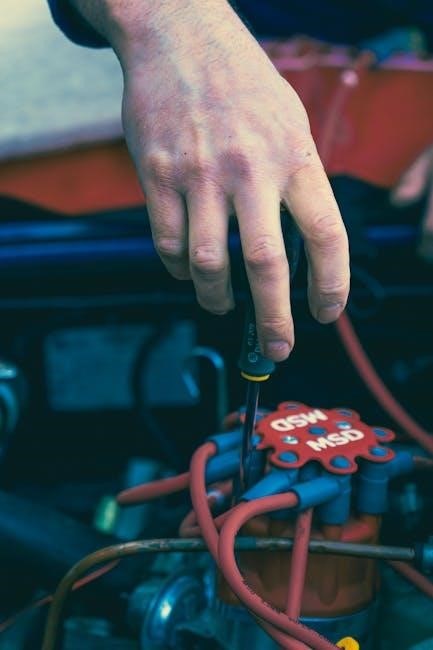
2.3 Ignition System Components and Their Functions
The ignition system generates the high voltage needed to create a spark in the engine’s combustion chamber. Key components include the spark plug‚ ignition coil‚ flywheel‚ and spark plug wire. The ignition coil transforms battery voltage into high voltage‚ which is then directed to the spark plug by the spark plug wire. The flywheel‚ equipped with magnets‚ rotates to generate the magnetic field necessary for the ignition coil to produce the spark. Proper function of these components is critical for reliable engine operation.
Troubleshooting Common Issues
Troubleshooting small engine problems involves identifying symptoms like poor performance or failure to start. Common issues include faulty spark plugs‚ clogged air filters‚ or fuel system blockages. Diagnosing these problems early ensures quick and effective repairs‚ minimizing downtime and extending engine life. Always refer to the repair manual for specific diagnostic steps and solutions tailored to your engine model.
3.1 Diagnosing Engine Start-Up Problems
Diagnosing engine start-up issues begins with checking the basics: fuel availability‚ spark plug functionality‚ and air filter condition. A faulty ignition coil or cracked fuel lines can prevent starting. Ensure the choke is functioning correctly and that the carburetor is clean. If the engine turns over but doesn’t start‚ inspect the spark plug for a weak spark or fouling. Consult the repair manual for specific diagnostic procedures and troubleshooting charts to pinpoint the exact cause efficiently. Regular maintenance can often prevent these issues from arising.
3.2 Identifying and Fixing Cooling System Leaks
Identifying cooling system leaks is crucial to prevent engine overheating and damage. Start by inspecting hoses‚ water pumps‚ and radiators for visible cracks or corrosion. Use a pressure test kit to locate leaks in the system. Common leak sources include loose connections‚ worn gaskets‚ or damaged seals. Once identified‚ replace faulty components and reseal connections using appropriate gaskets and sealants. Proper tightening and alignment are essential to ensure leaks do not recur. Regular inspection and maintenance can help prevent cooling system issues.
3.3 Solving Issues with the Muffler and Exhaust System
Muffler and exhaust system issues can cause noise‚ reduced performance‚ and emissions problems. Common issues include rust holes‚ loose connections‚ or clogged mufflers. Inspect the system for damage or corrosion. Replace rusted parts and tighten any loose connections. Clean or replace the muffler if clogged. Ensure all components are securely fastened to prevent leaks and vibration damage. Regular inspection and maintenance can help avoid costly repairs and ensure the engine runs smoothly and efficiently. Addressing these issues promptly prevents further damage to the engine.

Regular Maintenance Procedures
Regular maintenance is crucial for small engines‚ ensuring longevity and efficiency. Key tasks include oil changes‚ air filter cleaning‚ and spark plug replacement. Follow a schedule to avoid breakdowns and maintain performance.
4.1 Oil Change and Lubrication Guidelines
Regular oil changes are vital for small engine health. Use the recommended oil type and viscosity for your engine. Drain old oil safely and replace the filter. Lubricate moving parts like hinges and gears to prevent wear. Always refer to the manual for specific guidelines. Proper lubrication ensures smooth operation and extends engine life. Frequent oil changes prevent overheating and corrosion‚ keeping your engine running efficiently for years.
4.2 Air Filter Cleaning and Replacement
A clean air filter is essential for proper engine performance. Inspect and clean the filter regularly‚ following the manufacturer’s instructions. Foam or paper filters can be cleaned or replaced based on condition. A dirty filter reduces airflow‚ leading to poor combustion and reduced power. Replace the filter every 50-100 hours of use or as specified. Proper maintenance ensures efficient fuel use and prevents engine damage. Always ensure the filter is securely installed to avoid contaminants entering the engine.
4.3 Spark Plug Replacement and Gap Adjustment
Spark plugs are crucial for proper engine ignition. Replace them every 100-200 hours or as recommended. Remove the plug using a spark plug socket‚ ensuring no debris falls into the cylinder. Check the gap with a feeler gauge and adjust to specifications. A correct gap ensures efficient combustion and prevents engine misfires. Use a spark plug gap tool for precise adjustments. Always install the new plug by hand to avoid over-tightening‚ then torque it securely. Proper maintenance ensures reliable engine performance and fuel efficiency.
Disassembly and Inspection
Disassembly and inspection are critical steps in small engine repair. They allow you to identify wear‚ damage‚ or corrosion before it leads to major issues.
5.1 Step-by-Step Engine Disassembly Process
Begin by disconnecting the spark plug wire and draining the fuel. Remove the air filter and muffler to access the engine’s core components. Use a wrench to remove the cylinder head bolts‚ then gently lift the head. Next‚ take out the piston and connecting rod‚ ensuring not to damage the crankshaft. Carefully remove the crankcase cover to expose the internal gears and shafts. Document each step for easy reassembly later. This methodical approach ensures a smooth disassembly process.
5.2 Inspecting Piston and Cylinder Walls
Inspect the piston for scoring‚ cracks‚ or excessive wear. Check the cylinder walls for scratches‚ rust‚ or abnormal wear patterns. Use a flashlight and magnifying tool for a detailed examination. Measure the piston ring gap and compare it to the manufacturer’s specifications. Look for signs of overheating‚ such as discoloration. If damage is severe‚ consider replacing the piston or cylinder sleeve to ensure proper engine operation. Document any issues for further repair or replacement.
5.3 Checking for Wear on Moving Parts
Examine connecting rods‚ crankshafts‚ and camshafts for signs of wear. Look for scoring‚ excessive clearance‚ or abnormal patterns. Measure components with a micrometer to ensure they meet specifications. Check for play in bearings and journals. Inspect gears for teeth wear or misalignment. Replace any parts showing significant wear to prevent further damage. Lubrication levels and condition can also indicate wear. Document findings to guide necessary repairs or replacements. Proper inspection ensures smooth engine operation and prevents costly breakdowns.
Replacing Engine Components
Replacing engine components like piston rings‚ crankshafts‚ and bearings requires precision. Use specialized tools to ensure proper fitment and alignment. Follow manufacturer guidelines for replacement parts.
6.1 Replacing the Piston Ring and Cylinder Sleeve
Replacing piston rings and cylinder sleeves involves careful disassembly and inspection. Remove the engine block and piston‚ then extract the old rings and sleeve. Clean the area thoroughly before installing new components. Ensure precise alignment and torque specifications to avoid damage. Use a piston ring compressor for proper installation. Finally‚ reassemble and test the engine to confirm smooth operation and minimal wear; Always follow manufacturer guidelines for replacement parts and procedures.
6.2 Installing a New Crankshaft and Bearings
Installing a new crankshaft and bearings requires precise alignment and specialized tools. Begin by disassembling the engine to access the crankshaft. Remove the old bearings using a bearing puller and press. Clean the housing thoroughly before fitting the new bearings. Apply a thin layer of lubricant and align the crankshaft carefully. Use a torque wrench to secure the bearings according to manufacturer specifications. Finally‚ reassemble the engine and test for smooth operation. Proper installation ensures reduced friction and extended engine life.
6.3 Rebuilding the Carburetor and Fuel Pump
Rebuilding the carburetor and fuel pump involves disassembling‚ cleaning‚ and replacing worn components. Start by removing the carburetor and fuel pump‚ then carefully disassemble them. Clean all parts thoroughly using a carburetor cleaning solution. Inspect for worn or damaged components‚ such as gaskets‚ jets‚ or diaphragms‚ and replace them with new ones. Reassemble the parts following the manufacturer’s instructions. Test the fuel flow and ensure proper function before reinstalling. This process restores fuel efficiency and engine performance. Use a rebuild kit for convenience and accuracy. Always follow safety guidelines when handling fuel systems.

Reassembly and Testing
Reassembly requires careful alignment of parts and tightening according to specifications. Test the engine to ensure proper function‚ checking for leaks or unusual noises. Fine-tune performance.
7.1 Reassembling the Engine Step-by-Step
Reassembling the engine involves reversing the disassembly process‚ starting with the crankshaft and bearings. Ensure all components are clean and lubricated. Install pistons‚ rings‚ and cylinders with care‚ aligning them properly. Replace the engine head‚ connecting rods‚ and valve train in sequence. Tighten bolts gradually to specified torque settings. Finally‚ reattach external components like the carburetor and ignition system. Double-check all connections for leaks or misalignment before testing.
7.2 Testing the Engine After Repair
After reassembly‚ test the engine by checking for leaks and ensuring all systems function properly. Start with a visual inspection of connections and gaskets. Use a compression tester to verify piston and head integrity. Check the spark plug for a strong spark. Test the engine at idle and under load to ensure smooth operation. Monitor temperature and listen for unusual noises. Address any issues promptly to avoid further damage. A successful test confirms the repair’s effectiveness.
7.3 Fine-Tuning the Engine for Optimal Performance
Fine-tuning involves adjusting components like the carburetor‚ ignition timing‚ and fuel flow for peak efficiency. Start by ensuring the air-fuel mixture is balanced for smooth idle and power delivery. Adjust the idle screw to maintain steady RPMs without stalling. Check and synchronize throttle response for seamless acceleration. Monitor spark plug color to confirm proper combustion. Finally‚ test the engine under varying loads to ensure consistent performance and make necessary tweaks for optimal results.
Common Repair Mistakes to Avoid
Avoiding common repair mistakes is crucial for small engine longevity. Overlooking torque specifications‚ using incorrect gaskets‚ and ignoring safety protocols can lead to costly damage and performance issues.
8.1 Overlooking Proper Torque Specifications
Overlooking proper torque specifications is a common mistake during small engine repair. Incorrectly tightened bolts can lead to engine damage‚ such as stripped threads or cracked components. Always refer to the manufacturer’s torque chart to ensure accuracy. Using a torque wrench is essential for precise measurements. Improper torque can also affect engine performance‚ leading to issues like reduced power or increased wear. Consistency and adherence to specifications are key to maintaining engine integrity and preventing costly repairs.
8.2 Incorrect Use of Gaskets and Seals
The improper installation of gaskets and seals can lead to engine leaks‚ reduced performance‚ and costly damage. Common mistakes include using the wrong gasket material‚ incorrect sizing‚ or failing to ensure surfaces are clean and dry. Over-tightening or under-tightening can also compromise the seal. Always consult the repair manual for specific gasket requirements and installation techniques. Proper use ensures engine longevity‚ prevents fluid leaks‚ and maintains compression essential for efficient operation.
8.3 Ignoring Safety Protocols During Repair
Ignoring safety protocols during small engine repair can lead to serious injuries‚ fires‚ or environmental hazards. Failing to wear protective gear‚ such as gloves and safety glasses‚ increases the risk of burns or eye injuries. Additionally‚ improper handling of fuel or electrical components can result in explosions or electrical shocks. Always ensure proper ventilation‚ follow manufacturer guidelines‚ and keep fire extinguishers nearby. Neglecting safety can have severe consequences‚ making it crucial to prioritize caution throughout the repair process.

Advanced Repair Techniques
Advanced techniques enhance performance and efficiency‚ such as porting‚ polishing‚ and upgrading ignition systems. These methods require precision tools and expertise for optimal results and reliability.
9.1 Porting and Polishing the Engine for Performance
Porting and polishing are advanced techniques to enhance engine performance by improving airflow and reducing friction. Porting involves modifying intake and exhaust ports for better flow‚ while polishing smooths surfaces to reduce turbulence. These modifications can increase horsepower and efficiency. However‚ they require precise tools and expertise to avoid damaging the engine. Proper measurement and alignment are critical for successful outcomes. Always follow detailed guides or seek professional help for best results.
9.2 Upgrading the Ignition System for Better Spark
Upgrading the ignition system can significantly improve engine performance by ensuring a stronger‚ more consistent spark. Replacing spark plugs‚ ignition coils‚ or the capacitor with high-performance components can enhance combustion efficiency; This leads to increased power‚ smoother operation‚ and better fuel efficiency. Always ensure compatibility with your engine model. Proper installation and gap adjustment are critical for optimal results. Consulting a repair manual or a professional is recommended for complex upgrades.
9.3 Enhancing the Cooling System Efficiency
Improving cooling system efficiency is vital for maintaining optimal engine performance and preventing overheating; Ensuring proper airflow‚ inspecting hoses for leaks‚ and cleaning the radiator are essential steps. Upgrading to a high-performance coolant or installing an aftermarket cooling fan can enhance heat dissipation. Regularly flushing the cooling system and replacing worn-out components prevents corrosion and blockages. Always follow the manufacturer’s guidelines for coolant ratios and system maintenance. A well-maintained cooling system ensures reliable engine operation‚ especially in extreme conditions.
Specialized Tools and Equipment
Specialized tools like compression testers‚ micrometers‚ and dial indicators are essential for precise measurements and diagnostics. These tools help ensure accurate repairs and maintain engine performance effectively.
10.1 Using a Compression Tester for Diagnosis
A compression tester is a vital tool for diagnosing small engine issues. It measures the pressure inside the engine’s cylinders‚ helping identify problems like worn piston rings‚ blown head gaskets‚ or cracked cylinders. Low compression readings indicate potential issues‚ while consistent readings across cylinders suggest proper engine health. Regular use of a compression tester can help prevent major repairs by catching problems early. This tool is essential for any small engine repair toolkit‚ ensuring accurate and efficient diagnostics.
10.2 The Role of a Micrometer in Precision Measurements
A micrometer is a precision tool used to measure the thickness or diameter of small engine parts accurately. It ensures parts like piston rings‚ cylinders‚ and bearings are within manufacturer specifications. This tool helps identify wear and tear‚ crucial for determining if parts can be reused or need replacement. Accurate measurements are vital for maintaining engine performance and preventing premature wear. Regular use of a micrometer ensures precise fits and extends the engine’s lifespan. It is an essential tool for any small engine repair project.
10.3 Utilizing a Dial Indicator for Alignment Checks
A dial indicator is a precise tool used to measure alignment and wear in small engine components. It helps check crankshafts‚ camshafts‚ and gear alignments. Attach it to a stable engine part‚ zero the dial‚ and measure deviations. Proper alignment ensures smooth operation and prevents premature wear. Use it to verify specifications‚ diagnose issues‚ and make necessary adjustments. Regular checks with a dial indicator are vital for maintaining engine performance and longevity. Always follow manual guidelines for accurate measurements and adjustments.
Preventive Maintenance Tips
Preventive maintenance is key to small engine longevity. Regular oil changes‚ air filter cleaning‚ and spark plug replacements prevent breakdowns. Schedule seasonal inspections and store engines properly during off-season to ensure reliability and optimal performance.
11.1 Scheduling Regular Servicing Intervals
Regular servicing intervals are vital for small engines. Create a maintenance schedule based on usage‚ typically every 50-100 hours of operation. Include oil changes‚ air filter inspections‚ and spark plug replacements. Seasonal checks before storage and after winterizing ensure the engine runs smoothly year-round. Consistent servicing prevents unexpected breakdowns and extends the engine’s lifespan. Refer to the manufacturer’s guidelines for specific intervals tailored to your engine model and operating conditions.
11.2 Monitoring Engine Performance Metrics
Monitoring engine performance metrics ensures optimal operation and longevity. Track key indicators like RPM‚ power output‚ and fuel efficiency to detect issues early. Regular checks prevent breakdowns and costly repairs. Use tools such as multimeters or tachometers for accurate measurements. Compare findings with manufacturer specifications to identify deviations. Addressing anomalies promptly ensures smooth engine operation and extends service life. Consistent monitoring is essential for maintaining peak performance and reliability in small engines.
11.3 Storing the Engine Properly During Off-Season
Proper off-season storage preserves engine condition and prevents damage. Drain fuel or use a stabilizer to avoid degradation. Clean the engine thoroughly and apply rust-inhibiting oil. Store in a dry‚ cool place‚ away from direct sunlight. Cover the engine to protect from dust and moisture. Disconnect the battery and secure cables to prevent damage. Follow manufacturer guidelines for storage to ensure the engine remains ready for the next season. Proper storage extends the engine’s lifespan and reduces maintenance needs when restarting.
Mastering small engine repair requires patience and practice. By following this manual‚ you’ll gain essential skills to troubleshoot‚ maintain‚ and repair engines effectively. Regular care and proper techniques ensure longevity and performance. Keep your equipment running smoothly with these proven strategies and best practices.
12.1 Summary of Key Repair and Maintenance Practices
Effective small engine repair involves regular maintenance‚ proper tool usage‚ and adherence to safety protocols. Key practices include oil changes‚ air filter cleaning‚ spark plug replacement‚ and inspecting moving parts. Troubleshooting common issues like poor start-up or cooling system leaks can prevent major breakdowns. Rebuilding components such as carburetors and mufflers requires precision. Always refer to the manual for torque specifications and proper reassembly techniques. Consistent care ensures optimal performance and extends engine life.
12.2 Final Tips for Keeping Your Small Engine Running Smoothly
Regularly monitor engine performance and address issues promptly. Store engines properly during off-seasons to prevent damage. Use high-quality fuel and follow manufacturer guidelines for oil and filters. Keep the engine clean and free of debris. Avoid overloading or operating in extreme conditions. Schedule professional servicing if complex problems arise. Proper storage‚ consistent maintenance‚ and adherence to safety protocols ensure longevity and reliability. By following these practices‚ you can maintain optimal performance and extend the life of your small engine.