The Honeywell Pro Series Thermostat is a cutting-edge solution for smart home upgrades, offering advanced temperature control and energy efficiency.
It regulates coolant recirculation and radiator cooling, maintaining optimal engine temperatures, making it ideal for modern heating and cooling systems.
1.1 Overview and Features
The Honeywell Pro Series Thermostat is a cutting-edge solution for smart home upgrades, offering advanced temperature control and energy efficiency; It regulates coolant recirculation and radiator cooling, maintaining optimal engine temperatures, making it ideal for modern heating and cooling systems. With its sleek design and user-friendly interface, this thermostat provides precise temperature management, ensuring comfort and energy savings. It also features smart home integration, allowing users to control settings remotely through compatible systems. Additionally, the thermostat includes advanced features such as geofencing and smart sensors, which further enhance its functionality and efficiency. The Honeywell Pro Series is designed to enhance your home’s climate control while reducing energy consumption, making it a versatile and efficient choice for homeowners seeking advanced thermostat solutions.
1;2 Benefits of Upgrading
Upgrading to the Honeywell Pro Series Thermostat offers numerous benefits, including enhanced energy efficiency and smart home compatibility. Its advanced temperature control reduces energy consumption while maintaining comfort. With smart home integration, users can manage settings remotely, ensuring convenience and flexibility. The thermostat also supports geofencing and smart sensors, optimizing performance based on your location and home conditions. Additionally, it provides precise temperature regulation, reducing heating and cooling costs. The intuitive design and user-friendly interface make it easy to operate, while the downloadable manual ensures easy troubleshooting and maintenance. By upgrading, homeowners can enjoy a modern, efficient, and connected climate control system that adapts to their lifestyle, offering long-term savings and improved comfort. This thermostat is a valuable upgrade for anyone seeking a smarter, more efficient way to manage their home’s temperature.

Pre-Installation Requirements
Before installation, ensure system compatibility, gather necessary tools, and follow safety guidelines to prepare for a smooth setup of your Honeywell Pro Series Thermostat.
2.1 System Compatibility Check
Before installing the Honeywell Pro Series Thermostat, ensure your HVAC system is compatible. Check the thermostat’s voltage requirements and verify if it supports your system type (e.g., forced air, radiant, or heat pump). Inspect existing wiring to confirm it matches the thermostat’s terminal connections. Refer to the manual for specific compatibility guidelines. Additionally, ensure your system’s cooling and heating stages align with the thermostat’s capabilities. Proper compatibility ensures seamless operation and avoids installation issues. If unsure, consult a professional or contact Honeywell support for assistance. This step is crucial for optimal performance and energy efficiency.
2.2 Tools and Materials Needed
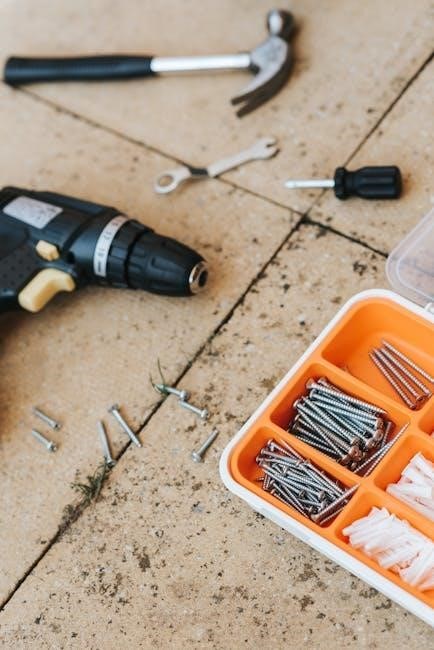
To install the Honeywell Pro Series Thermostat, gather the necessary tools and materials to ensure a smooth process. You will need a screwdriver (both Phillips and flathead), wire strippers, a voltage tester, a drill, and wall anchors if the thermostat doesn’t come with them. Additionally, have a level handy to ensure the thermostat is mounted straight. If your system requires it, you may also need a C-wire adapter or a smart thermostat wiring kit. Refer to the manual for specific materials included in the package. Having all tools and materials ready beforehand will save time and prevent delays during installation. Always follow safety precautions when handling electrical systems.
2.3 Safety Precautions
Before starting the installation, ensure all safety precautions are followed to avoid injuries or damage. Turn off the power to the HVAC system at the circuit breaker or fuse box. Verify the system is completely powered down using a voltage tester. Never work on live electrical systems, as this can result in electrical shock or injury. Wear protective gloves and safety glasses when handling tools or wires. Be cautious when handling sharp objects or materials. If you are unsure about any step, consider consulting a licensed electrician. Additionally, ensure the area is well-ventilated and free from flammable materials. Always follow the manufacturer’s guidelines and safety recommendations to ensure a safe and successful installation;
Installation Process
The Honeywell Pro Series Thermostat installation involves removing the old unit, mounting the new thermostat, and connecting wires as per the manual’s instructions. Ensure power is off during installation for safety.
3.1 Removing the Old Thermostat
Start by switching off the power to your HVAC system at the circuit breaker or fuse box to ensure safe removal. Locate the old thermostat and gently pull it away from the wall mount. For wired thermostats, carefully disconnect the wires from their terminals, noting their colors and positions for reference during the new installation. If the thermostat is held in place by screws, remove them using a screwdriver. For battery-powered models, simply remove the cover and take out the batteries before detaching the unit from the wall. Avoid damaging the wiring or mounting bracket, as these may be reused for the new thermostat. Once removed, set the old thermostat aside and prepare for mounting the Honeywell Pro Series unit. Ensure all wires are labeled or photographed for accurate reconnection later. This step is crucial for a smooth transition to the new system. Always follow safety guidelines to prevent electrical hazards.
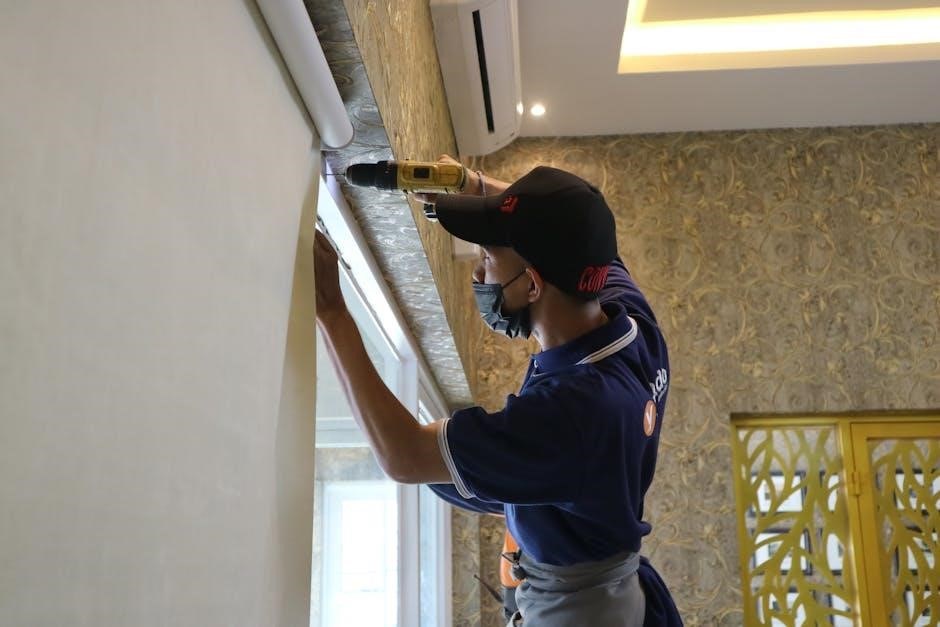
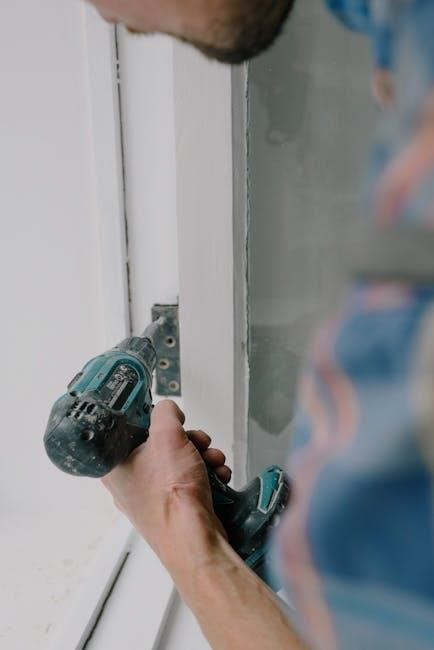
3.2 Mounting the New Thermostat
To mount the Honeywell Pro Series Thermostat, begin by ensuring the wall surface is clean, dry, and level. Peel the backing from the adhesive strip on the back of the thermostat’s mounting plate and press it firmly onto the wall, aligning it straight. If using screws, drill pilot holes if necessary and secure the mounting plate to the wall. For added stability, ensure the thermostat is centered and level. Once the mounting plate is in place, gently attach the thermostat unit to it, ensuring it clicks or snaps securely into position. If your system requires a common wire or additional connections, attach the necessary wires to the mounting plate. Finally, plug in the power cable if applicable and ensure the thermostat is stable before proceeding to the wiring step. Proper mounting ensures accurate temperature readings and smooth operation.
3.3 Installing the Thermostat Unit
Once the mounting plate is secured, carefully attach the Honeywell Pro Series Thermostat unit to it. Ensure the thermostat aligns with the mounting plate’s tabs or screws. Gently snap or screw the unit into place, depending on the model. Connect the wires to the appropriate terminals on the thermostat, following the wiring diagram provided in the manual. If your system requires a common wire (C), ensure it is properly connected to maintain consistent power. After securing the wires, turn the power back on at the circuit breaker. Test the thermostat by adjusting the temperature settings to ensure it responds correctly. Handle the thermostat by the edges to avoid touching sensitive components. If unsure about any step, consult a licensed professional to avoid damage or safety risks. Proper installation ensures reliable performance and energy efficiency.
Wiring and Connections
Ensure the power is off before starting. Follow the wiring diagram to connect the appropriate wires to the thermostat terminals. Secure all connections tightly and double-check for accuracy. If your system requires a common wire, confirm it is properly connected. Refer to the manual for specific wiring configurations. Proper wiring ensures optimal performance and safety. Always turn off the power at the circuit breaker before handling any wires. If unsure, consult a licensed electrician to avoid potential hazards or system damage. Correct wiring is crucial for reliable thermostat operation and energy efficiency.
4.1 Understanding Wiring Requirements
Understanding the wiring requirements for the Honeywell Pro Series Thermostat is essential for a successful installation. The thermostat is compatible with most HVAC systems, including forced air, heat pumps, and radiant floor systems. Ensure your system uses a 24V AC power supply, as the thermostat is not compatible with high-voltage or millivolt systems. The wiring typically includes a common (C) wire, which is necessary for powering the thermostat. If your system lacks a C wire, you may need to install one or use a C-wire adapter. Refer to the manual to confirm compatibility with your specific system type. Correct wiring ensures proper thermostat operation and avoids potential damage to your HVAC system. Always turn off the power at the circuit breaker before handling any wires. If unsure, consult a licensed electrician to ensure safe and accurate installation. Proper wiring is critical for optimal performance and energy efficiency.
4.2 Connecting the Wires
Connecting the wires for the Honeywell Pro Series Thermostat requires careful attention to ensure proper functionality. Start by turning off the power to your HVAC system at the circuit breaker. Identify the wires from your old thermostat and label them if necessary. Refer to the manual to match each wire to the correct terminal on the new thermostat. Typically, wires are color-coded: red (R) for heating, white (W) for cooling, yellow (Y) for fan, green (G) for fan control, and blue or black (C) for common. Gently insert each wire into the corresponding terminal, ensuring they are securely connected. Use the included wire labels to keep track of connections. Avoid forcing wires into incorrect terminals, as this can damage the thermostat or your HVAC system. Once all wires are connected, tighten the terminal screws firmly. Double-check all connections before restoring power to the system. If unsure, consult a licensed electrician to avoid potential risks.
4.3 Testing the Wiring Connections
After connecting the wires, it’s essential to test the wiring connections to ensure everything functions correctly. Begin by turning the power back on at the circuit breaker. Use a multimeter to check for voltage and continuity, verifying that each wire is securely connected to the correct terminal. Refer to the wiring diagram in the manual to confirm proper connections. Test each wire individually, starting with the power wires (R and C), followed by heating (W), cooling (Y), and fan (G) wires. Ensure the thermostat powers on and displays the correct settings. If the display doesn’t light up, check the common wire connection. Run the thermostat through a heating and cooling cycle to test functionality. If issues arise, consult the manual or contact a licensed electrician for assistance.

Configuration and Setup
Configure your Honeywell Pro Series Thermostat by pairing it with your system and setting basic parameters for optimal performance and smart home integration.
5.1 Initial Setup and Pairing
Start by powering on the Honeywell Pro Series Thermostat and following the on-screen instructions to navigate through the initial setup menu.
Select your preferred language and location settings to ensure accurate temperature control and system compatibility.
Next, connect the thermostat to your Wi-Fi network by entering your network password when prompted.
Once connected, download and install the Honeywell Home app to pair your thermostat with your smartphone or smart home system.
Follow in-app instructions to complete the pairing process, ensuring your thermostat is linked to your account for remote control and advanced features.
For added security, set up a unique password during the initial setup to protect your thermostat settings and data.
This step ensures seamless integration and prepares your thermostat for further configuration and smart home capabilities.
5.2 Scheduling and Temperature Control
After pairing, navigate to the scheduling menu to create a customized temperature schedule tailored to your daily routine.
Set specific temperature levels for different times of the day, such as wake, leave, return, and sleep, to optimize comfort and energy efficiency.
Use the Honeywell Home app to adjust schedules remotely or enable geofencing, which automatically adjusts temperatures based on your location.
Adjust temperature settings manually using the touchscreen or app, with options to hold the temperature temporarily or permanently.
Explore energy-saving modes, such as eco-mode, to reduce energy consumption while maintaining a comfortable environment.
Regularly review and update your schedule to ensure it aligns with your lifestyle and seasonal changes.
This feature ensures your home stays comfortable while minimizing energy waste, making it easy to balance convenience and efficiency.
5.3 Smart Home Integration
The Honeywell Pro Series Thermostat seamlessly integrates with popular smart home systems like Amazon Alexa, Google Home, and Apple HomeKit.
Enable voice control to adjust temperatures, set schedules, or switch modes hands-free, enhancing convenience and accessibility.
Pair the thermostat with other smart devices, such as lights or security systems, to create a unified smart home experience.
Use the Honeywell Home app to connect your thermostat to your smart home ecosystem, ensuring compatibility and smooth operation.
Customize scenes and routines, like lowering the temperature when you leave home or raising it when you return, for effortless energy management.
Smart home integration allows for advanced automation, making your Honeywell Pro Series Thermostat a central part of your connected lifestyle.
Refer to the app for specific pairing instructions, as setup may vary depending on your smart home platform.
Advanced Features
The Honeywell Pro Series Thermostat offers geofencing, smart sensors, and energy-saving modes for enhanced comfort and efficiency. These features optimize temperature control and reduce energy usage automatically.
6.1 Geofencing and Smart Sensors
The Honeywell Pro Series Thermostat integrates geofencing technology, which uses your smartphone’s location to automatically adjust temperatures when you leave or arrive home. This feature ensures energy savings by optimizing heating and cooling based on occupancy. Additionally, smart sensors can be installed in multiple zones to detect temperature levels, humidity, and occupancy, providing precise comfort control. These sensors communicate with the thermostat to maintain consistent temperatures across your home. Geofencing and smart sensors work together to create a seamless, energy-efficient experience, adapting to your lifestyle without manual adjustments. This advanced functionality enhances comfort and reduces energy waste, making it a standout feature of the Honeywell Pro Series.
6.2 Energy-Saving Modes
The Honeywell Pro Series Thermostat offers advanced energy-saving modes designed to reduce energy consumption without compromising comfort. The Energy Star-certified thermostat includes an Eco mode that adjusts temperatures slightly when you’re asleep or away, minimizing energy use. Additionally, the Smart Recovery feature learns your system’s performance to pre-cool or pre-heat your home efficiently, ensuring optimal temperatures while saving energy. These modes can be activated manually or programmed into your schedule for seamless operation. By utilizing these energy-saving features, you can lower your utility bills and reduce your environmental impact. The thermostat also provides energy usage reports, helping you track and refine your energy-saving strategies for maximum efficiency.

Troubleshooting Common Issues
Identify and resolve common issues like blank screens, uneven temperatures, or unresponsive controls. Check power supply, sensor accuracy, and wiring connections. Restart the thermostat or restore default settings if needed. Consult the user manual or contact Honeywell support for further assistance.
7.1 Common Issues and Solutions
Address common issues like a blank or unresponsive screen by checking the power supply and ensuring proper wiring. If the thermostat displays incorrect temperatures, recalibrate the sensor or reset the device. For Wi-Fi connectivity problems, restart the router and ensure the thermostat is properly paired. If the system fails to heat or cool, verify the schedule settings and temperature limits. Check for loose wiring connections and ensure the circuit breaker is on. For persistent issues, perform a factory reset by pressing and holding the menu button for 10 seconds. Always refer to the user manual for detailed troubleshooting steps or contact Honeywell support for assistance. Regular updates and maintenance can prevent many of these issues.
7.2 Resetting the Thermostat
To reset the Honeywell Pro Series Thermostat, start with a soft reset by turning the power off at the circuit breaker for 30 seconds. This resolves minor glitches without losing settings. For a hard reset, press and hold the menu button while restoring power. Release after 5 seconds to reset to factory defaults. Note that this will erase all custom settings, requiring reconfiguration. Alternatively, navigate to the settings menu, select “Factory Reset,” and confirm. This restores default settings while retaining Wi-Fi credentials. Always reset the thermostat after resolving wiring or connectivity issues to ensure proper operation. Regular resets can help maintain optimal performance and resolve recurring issues. Refer to the manual for detailed reset procedures tailored to your model.
7.3 Diagnostics and Error Codes
The Honeywell Pro Series Thermostat includes advanced diagnostic tools to identify and resolve issues. Error codes displayed on the screen indicate specific problems, such as connectivity issues or sensor malfunctions. Common codes include E1 (temperature sensor error) and E30 (internet connectivity loss). Refer to the user manual for a full list of codes and their meanings. To access diagnostics, navigate to the settings menu and select “Diagnostics” to view system status and error logs. If an error persists, restart the thermostat or check wiring connections. For unresolved issues, contact Honeywell support for assistance. Regularly reviewing diagnostic data helps maintain optimal performance and prevents potential failures. Use these tools to troubleshoot effectively and ensure your system operates smoothly.

Maintenance and Upkeep
Regularly clean the Honeywell Pro Series Thermostat to ensure optimal performance. Check for dust buildup and ensure proper airflow. Update firmware periodically for improved functionality and security. Inspect wiring connections for any signs of wear but avoid altering them unless necessary.
8.1 Cleaning and Maintenance Tips
Regular cleaning of the Honeywell Pro Series Thermostat ensures optimal performance. Use a soft, dry cloth to wipe the display and exterior, avoiding harsh chemicals or liquids. Power down the device before cleaning to prevent damage. Check wiring connections for tightness and inspect for wear. Ensure proper airflow by keeping the surrounding area clear of obstructions. For battery-powered models, replace batteries annually or when the low-battery indicator appears. Avoid exposing the thermostat to direct sunlight or extreme temperatures. Periodically update the firmware to maintain functionality. Schedule annual professional checks to ensure system efficiency and longevity. These simple steps help maintain your thermostat’s accuracy and extend its lifespan.
8.2 Updating Firmware
Updating the firmware of your Honeywell Pro Series Thermostat ensures access to the latest features, improvements, and bug fixes. To update, connect the thermostat to your Wi-Fi network and access the settings menu. Select “Firmware Update” or “Software Update” and follow on-screen instructions. The device will automatically check for updates, download, and install the latest version. Ensure the thermostat remains powered on during the update process to avoid interruptions. For non-Wi-Fi models, updates may require a USB connection or professional assistance. Regular firmware updates enhance performance, compatibility, and security. Always refer to Honeywell’s official support website for detailed instructions and release notes specific to your model. This ensures a smooth and successful update process.
The Honeywell Pro Series Thermostat is now successfully installed and configured. Enjoy enhanced efficiency, convenience, and smart home integration. Refer to the manual or Honeywell support for further assistance.
9.1 Final Tips for Optimal Performance
To ensure your Honeywell Pro Series Thermostat operates at its best, perform regular maintenance such as cleaning the display and checking wire connections. Schedule temperature adjustments to align with your daily routine for energy efficiency. Utilize geofencing and smart sensors for automated control. Periodically review and update your thermostat’s schedule to reflect changes in your lifestyle. For optimal performance, keep the thermostat away from direct sunlight and drafts. Always refer to the user manual for troubleshooting common issues. Updating the firmware regularly ensures you have the latest features and improvements. By following these tips, you can maximize comfort, energy savings, and system longevity.
9.2 Warranty and Support Information

Your Honeywell Pro Series Thermostat is backed by a comprehensive warranty, typically covering parts and labor for up to 5 years, depending on the model and region. For detailed terms, refer to the warranty document provided with your purchase. Honeywell offers dedicated customer support to address any inquiries or issues. Visit their official website for contact information, live chat options, or to submit a support ticket. Ensure your thermostat is registered on Honeywell’s portal to validate the warranty and receive updates. Additionally, consult the user manual or online resources for troubleshooting guides and FAQs. Honeywell’s commitment to quality and customer satisfaction ensures reliable support for your thermostat needs.