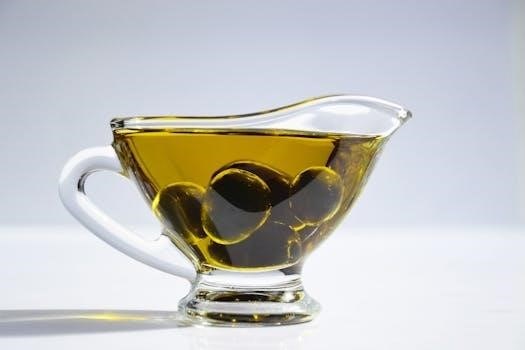
Odies Oil⁚ Comprehensive Application Guide
Welcome to your guide for using Odies Oil, a revolutionary finish known for its natural, durable, and safe properties. This guide will walk you through the necessary steps for application, ensuring a beautiful and long-lasting finish on various surfaces, from wood to concrete and beyond.
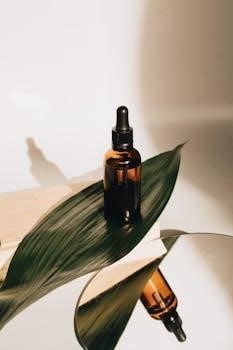
Odies Oil stands out as a unique and innovative wood finish, formulated with natural oils and waxes, offering a non-toxic alternative to conventional finishes. It’s designed to not only protect but also enhance the natural beauty of various surfaces. Unlike many finishes that create a layer on top, Odies Oil cross-links with the material, creating a new, contiguous surface that is more stable and resistant to external factors. This makes it suitable for diverse applications, from small woodworking projects to large-scale industrial uses; The product is made by hand in small batches in the USA, ensuring quality and consistency. Odies Oil is incredibly versatile, working on wood, concrete, stone, metal, plastic, and even leather, making it a go-to choice for many artisans. It’s known for its ease of use, requiring no complicated steps, and offering a customizable sheen level. Furthermore, its sustainability is notable, with zero waste production and a formulation that doesn’t leach toxic chemicals, making it safe for both the user and the environment. With Odies Oil, you’re not just applying a finish; you’re connecting with your project on a deeper, more natural level.
Surface Preparation for Odies Oil
Proper surface preparation is crucial for achieving the best results with Odies Oil. Begin by ensuring that the surface is clean, dry, and free from any dust, dirt, or previous finishes. For wood, sanding is essential, and you should progress through increasingly finer grits to achieve a smooth, even surface. The final sanding grit will determine the smoothness of your finished project. It is important to note that Odies Oil has no sanding limits, giving you flexibility in achieving your desired texture. For concrete, stone, or other non-wood surfaces, make sure to remove any loose particles or debris. You may need to use a cleaning solution and scrub brush for deeper cleaning. If you’re working with metal, ensure the surface is free of rust or corrosion. For leather, a simple wipe down might be sufficient. Remember, the goal of surface preparation is to provide a receptive canvas for the oil, allowing it to penetrate and bond effectively. Always ensure the surface is completely dry before proceeding with the application of Odies Oil. Proper prep work ensures the oil will perform optimally.
Essential Tools for Applying Odies Oil
To effectively apply Odies Oil, you’ll need a few key tools. First, a non-woven pad, rated above the grit or micron of your last sanding, is crucial for working the oil into the surface. This pad helps to create friction, which is essential for the oil to penetrate deeply. You’ll also need clean cotton terry cloth towels for removing excess oil. For larger projects, a buffer or hand polisher may be beneficial, especially for flooring or countertops. The type of pad used will depend on the desired sheen and the material you are working with. Red pads and white pads are often used on floors. A brush or roller may be used for Super Duper Oil or Super Duper Dark Oil. Remember, the goal is to evenly distribute the oil and remove any excess, so choose tools that facilitate this. These are the essential tools to apply your Odies Oil finish.
Step-by-Step Application Process
The application of Odies Oil is straightforward, focusing on even distribution and proper absorption. Begin by ensuring your surface is clean and properly prepared. Next, stir your jar of Odies Oil thoroughly, as ingredients may settle over time. Apply a small amount of Odies Oil to a non-woven pad. Work the oil into the surface using a circular or back-and-forth motion, ensuring the friction created drives the product into the material. Remember, a little goes a long way, so don’t over apply. Check the surface frequently for dry spots and apply more oil if needed. Once the surface is covered, allow the oil to sit for a short time. Then, use a clean cotton terry cloth towel to remove any excess oil, buffing the surface until it feels dry to the touch. This process is similar to waxing a car, making it easy for anyone to master.
Initial Application
The initial application of Odies Oil is crucial for achieving the desired finish and protection. Start by ensuring the surface is properly prepared, whether it’s wood, concrete, or another material. Begin with a small amount of Odies Oil; remember, it’s highly concentrated, and a little goes a long way. Using a non-woven pad, apply the oil evenly to the surface, working it in a circular motion. The goal is to create friction, which helps the oil penetrate the material effectively. Do not saturate the surface; instead, focus on even coverage. Check for any dry spots and add more oil as necessary to maintain consistent coverage. This initial layer sets the foundation for the rest of the process, ensuring the oil can properly bind and create a durable, protective finish. It’s essential to avoid puddles of oil, as these can lead to uneven drying.
Working the Oil into the Surface
After the initial application, the next step is thoroughly working the Odies Oil into the surface. This process is critical for ensuring the oil bonds properly with the material, be it wood, concrete, or any other surface. Using a non-woven pad, continue to rub the oil into the surface using circular motions. The friction generated during this process is key, as it helps the oil penetrate deeply into the pores of the material. This step requires a bit of effort, but it is vital for achieving a robust and long-lasting finish. Ensure that you are working in small sections to maintain control and consistency. Pay close attention to the surface, checking for any areas that may not be absorbing the oil evenly. Continue working the oil until it is fully integrated into the material and no longer appears wet on the surface, but has been fully absorbed.
Dealing with Excess Oil
After you’ve worked the Odies Oil into the surface, it’s crucial to address any excess oil that remains. Failing to do so can result in a sticky or uneven finish. Using a clean cotton terry cloth towel, gently wipe away any excess oil from the surface. It’s important to use a clean cloth to avoid reintroducing any oil back onto the surface; Be thorough in your wiping, paying special attention to any areas where oil may have pooled or accumulated. The goal is to remove any visible wetness from the surface, leaving only the oil that has been absorbed into the material. This step may require multiple passes with a clean cloth, so don’t hesitate to use a fresh section of the towel or grab a new one as needed. Remember, a little goes a long way with Odies Oil, so it’s better to remove too much than not enough.
Drying and Curing Time
Understanding the drying and curing times for Odies Oil is crucial for achieving the best results. While the surface may feel dry to the touch relatively soon after application, it’s important to allow sufficient time for the oil to fully cure. This process involves the oil cross-linking with the surface, creating a durable and protective finish. Initial drying time can vary depending on environmental factors such as temperature and humidity, but generally, the surface will be dry to the touch within a few hours. However, full curing can take longer, typically around 10 hours for concrete and up to 2 weeks for wood, especially before a ceramic coat. It’s best to avoid heavy use or exposure to liquids during the initial curing phase. For maintenance or re-coats, allow at least 10 hours of cure time for the best outcome; This patience will ensure the finish reaches its full potential in terms of durability and protection.
Achieving Desired Sheen Levels

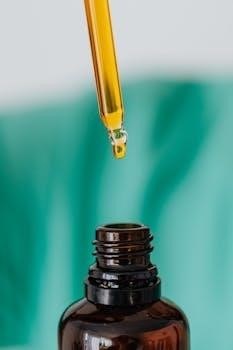
Odies Oil offers remarkable flexibility in achieving your desired sheen level, from a matte finish to a high gloss. The key to controlling sheen lies in the application and buffing process. For a matte finish, apply the oil as directed and ensure you wipe away any excess thoroughly, without extensive buffing. If you’re aiming for a glossier appearance, after the initial application and removal of excess, use a clean, dry cloth or a buffing pad to polish the surface. The more you buff, the higher the sheen you will achieve. For high sheen applications, you can use specific pads, such as 800 grit for gloss or 1500 for high sheen. The technique involves working the product into the wood with a pad, creating friction which helps drive the product into the surface. Remember to regularly change to clean pads during the process to avoid residue buildup. Experiment with buffing to find your preferred level of shine.
Odies Oil on Different Materials
Odies Oil is incredibly versatile and can be used on a wide range of materials beyond just wood. When applying to hardwoods, like dense exotics or domestic options, follow the standard application, remembering that coverage varies based on the wood’s density. For softer woods such as pine and fir, apply a little less oil due to their porous nature. On concrete, Odies Oil acts as a densifier, providing a protective layer. Begin with a clean surface and apply the oil with a burnisher, then buff until completely dry, achieving different sheens with various buffing pads. For leather, apply a small amount and buff off immediately within 10-15 minutes to prevent over-saturation. When treating metal, ensure a clean surface before applying. On epoxy and resin projects, use less oil than on wood, and follow the same basic application.
Maintenance and Reapplication
One of the great advantages of Odies Oil is its low-maintenance nature. Typically, surfaces treated with Odies Oil do not require frequent reapplication. In most cases, you won’t need to refresh the finish for many years. When the time comes for maintenance, simply clean the surface thoroughly. Then, apply a light coat of Odies Oil to refresh the finish. There is no need for sanding or stripping, making reapplication quick and easy. Spot treatments are also simple; reapply oil to the affected area without worrying about overlaps or mismatches. This is because Odies Oil does not yellow over time like other finishes. Regular cleaning will help maintain the sheen and integrity of the finish. For areas that see heavier use, more frequent light applications may be necessary to maintain protection and beauty.
Safety and Disposal Instructions
Odies Oil is known for its non-toxic nature, but proper safety measures and disposal techniques are still essential; Always ensure that you are working in a well-ventilated area to avoid any build-up of fumes, although Odies Oil is solvent-free and has minimal odor. Wear gloves if you have sensitive skin to prevent any potential irritation. When using non-woven pads, cotton cloths, or other application materials, be careful to avoid leaving them in piles. Instead, immediately after use, submerge all oil-soaked materials such as rags in water overnight to prevent spontaneous combustion. Ensure they are completely saturated in water. After soaking, hang the materials to dry outside in a safe place before proper disposal. Do not leave soaked materials in a pile. Always read and follow the safety instructions provided by Odies Oil for proper use and disposal of products.
